
A disk image is a special file that includes data and structure of the physical disk. But to use this virtual copy, you need to mount it first. Mounting is a process that makes a virtual disk – image – available and recognizable by the operating system. After you mount image, Mac OS is able to see the content of the virtual disk and work with it just like with any other physical media. I would like to explain how to mount an image on Mac and how to use the images.
To mount a disk image, Mac uses a special utility. With it you can just double-click on the needed image to mount it. However, this application works with a rather narrow range of virtual disk types. If for some reasons the native tool for Mac is not working with your image, then I advise you to install the third-party application – image mounter.
Disk image mounter – Mac program that mounts any types of virtual disks – is a special software that makes an image accessible to the operating system. This operation is similar to the insertion of the ordinary physical disk to the drive. Although to mount image, Mac automatically uses its native tool, I advise you to work with the program that is specially designed for this operation. DAEMON Tools for Mac – a smart and compact tool that "knows" how to mount a disk image regardless of its type.
How to mount an image on Mac, using DAEMON Tools?
Download and install the program on your computer. DAEMON Tools has a trial period, so during the first 20 days you can use the program for free.
After the program is installed, the images on your Mac are associated with it. Now you can double-click on any image – and it will be mounted. Just after you mount image, Mac OS recognizes it, so you are able to use it just like an ordinary physical disk.
However, I advise you to use the program's interface, because in this case you will be able not only to mount images, but also to organize them.
How to mount a disk image from application window of DAEMON Tools for Mac?
There are several ways of how to mount an image on Mac, using DAEMON Tools. Here are they all:
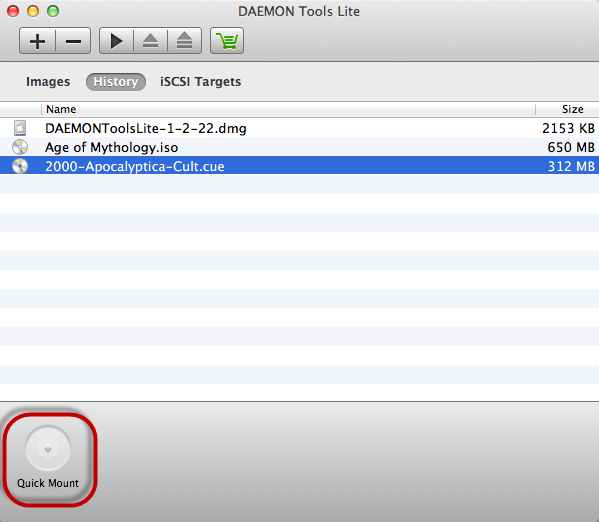
- In the program window, click Quick Mount button and choose an image file from your Mac:
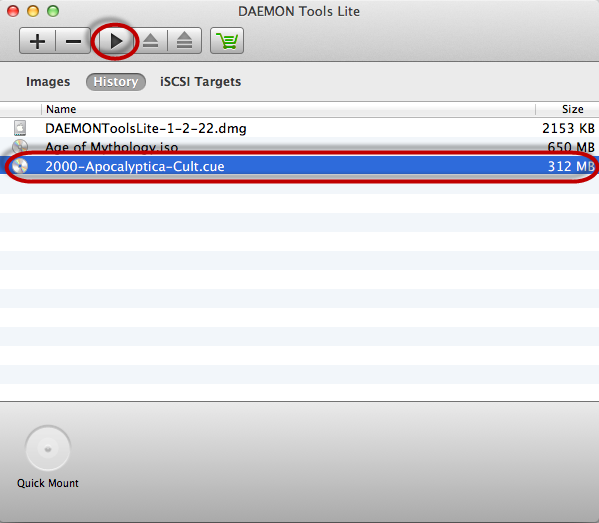
- In the program window, choose an image that is stored on Images or History tabs and click Mount icon on the toolbar:
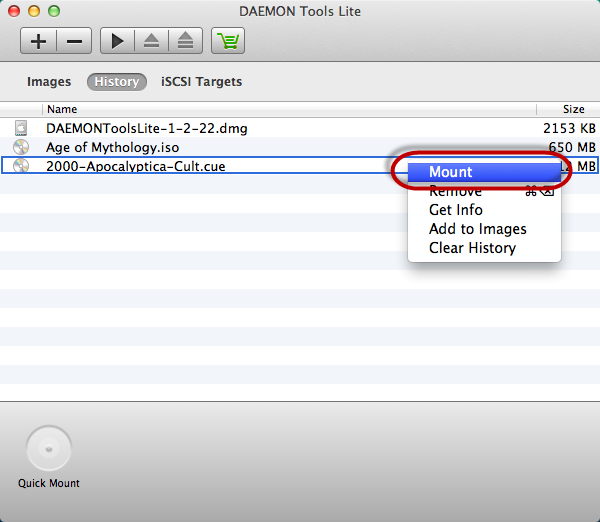
- In the program window, select an image from Images or History tabs and choose Mount option in its contextual menu:
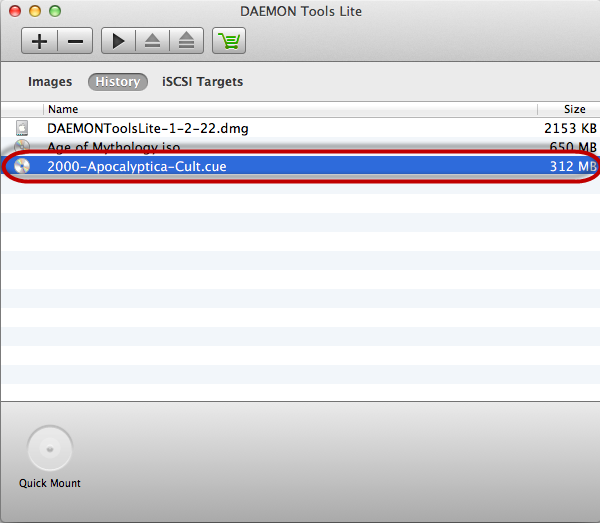
- In the program window, select any image from Images or History tabs and double-click on it:
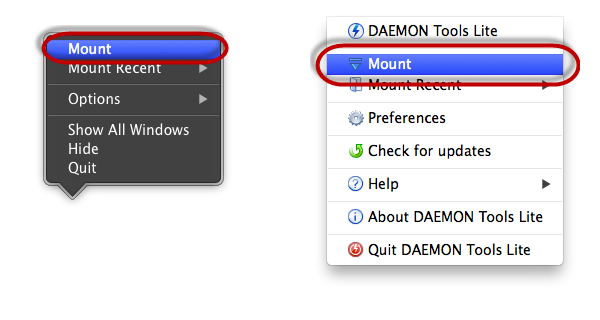
- Click application icon in the menu bar or Dock, choose Mount option and find an image on your computer:
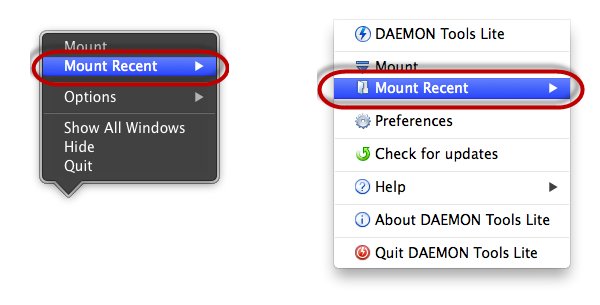
- Click application icon in the menu bar or Dock, open Mount Recent submenu and choose an image from the list. Note that Mount Recent submenu shows only the images that were mounted sometime ago:
- Use the hotkeys that can be set in Preferences.
If you still have questions about how to mount an image on Mac, visit other articles in the blog. For example, you can read about how to mount an audio disk or how to mount an ISO image. Also, feel free to ask any related question in the comments below.