DAEMON Tools Ultra includes lots of advanced features, and not all of them are related to imaging. Starting from DAEMON Tools Ultra 5, the developers introduced one more thing that makes it an essential app for home usage. Meet the File Backup feature and let’s try it in action!
Why do you need file backup software?
I’m not a paranoid and I do trust modern technologies. Still, it’s better to be sure and always have a recovery plan. Here is mine: file backup software that copies and protects my data, so in case of hardware failure, network issue, operating system crash or any other unpredictable situation I will be able to restore the files I need.
Not sure that you need to back up files? Then imagine that you can lose private documents, wedding photos, the project you’ve been working on during long nights… Sounds awful, doesn’t it? DAEMON Tools Ultra will help!
How to back up files with DAEMON Tools Ultra
First, I need to download and install DAEMON Tools Ultra 5. It has a 14-day Free Subscription for new users, so you can try it before buying. You just need to choose the relevant option during the installation and enter your valid email address.
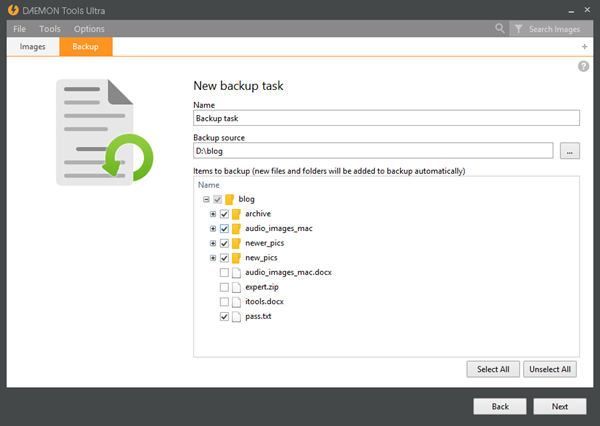
After installing DAEMON Tools Ultra, go to “Tools” menu and choose “Create a new Backup Task” option. There are plenty of settings here, but you need to adjust them only once — and the task will work automatically in background and won’t bother you. So, let’s start our first file backup!
I’ve entered the name of the task (the task may work for months, so be sure you will recognize it after a while), the backup source and selected files I want to back up. By default, all files and folders from the source directory appear in the task, and you need to check the ones you want to copy. Note that when you update the source for the created task, all new files are added automatically.
I clicked “Next” and got the new list of options for my file backup. Let’s continue!
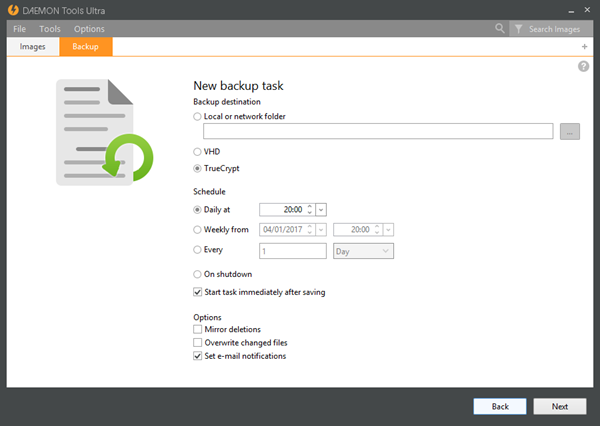
First, here is a backup destination — some folder or disk where my backup will be stored. I have three options: a folder (both local or network one), a virtual hard disk or a TrueCrypt container.
The folder is the easiest way to start: you just need to choose the one and be sure that you have enough space there. VHD file is a bit more elegant way to store the backed up files. All of them will be packed in a single virtual disk that you may mount with DAEMON Tools. And the safest destination is a TrueCrypt container, or in other words, a password-protected disk.
I’ve already described the advantages of TrueCrypt containers in DAEMON Tools Ultra and told about how to create the one. You may visit the previous article to get to know more about this file format, while I’ll go to the second group of options.
Schedule comes next. DAEMON Tools Ultra allows you not only to back up data but also to make this process automatic. You can choose when to back up files and forget about the task because DAEMON Tools Ultra will make the rest. Together with the date and time options, there’s “On shutdown” event. If you choose it, DAEMON Tools Ultra will back up files each time you switch the PC off.
I don’t want to wait even for the first backup, so I’ve checked “Start task immediately after saving” option too. Here are the ones that left:
- With “Mirror deletions” option checked, the files removed from the source are removed from the destination too. I free the space in the source folder from time to time but don’t want it to affect the backup, so I’ve unchecked it.
- “Overwrite changed files” option talks for itself. I want to keep all versions of the files, so it’s not for me too.
- “Set email notifications” option requires a bit more adjusting, but it worth the effort. I clicked it and got the next window:
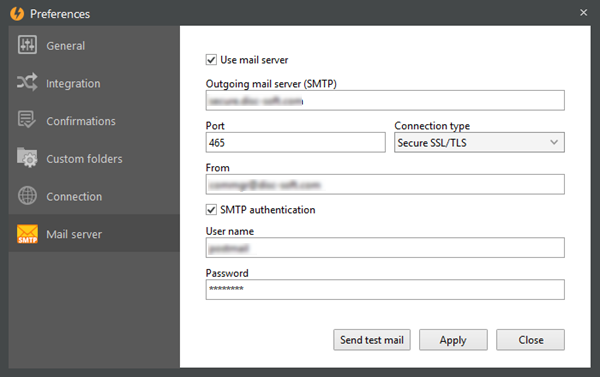
As you may have already guessed, I need to set up the email server to send the messages about the task progress. Sounds geeky, but it’s easy actually. If you’ve adjusted the mailing in your phone at least ones, you know what to do!
After the mail server is ready, I go to the next step. As for I’ve chosen TrueCrypt as a backup destination, I will create it now. Same for the VHD. If you select a folder — nothing more should be adjusted.
And the last step: I should check when and to which email to send the notifications about file backup progress.
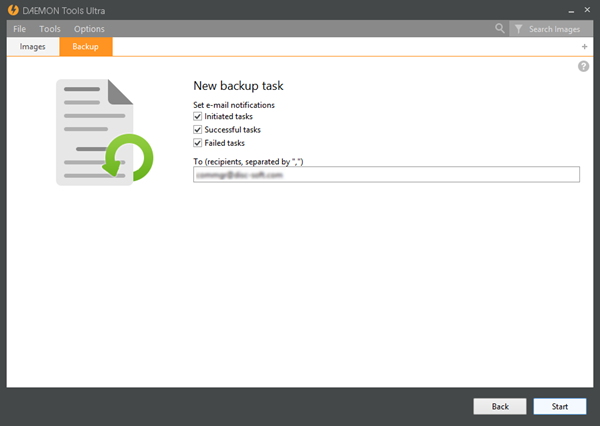
Finally, click “Start” and wait a few seconds… My file backup task appears on the dashboard in a while:
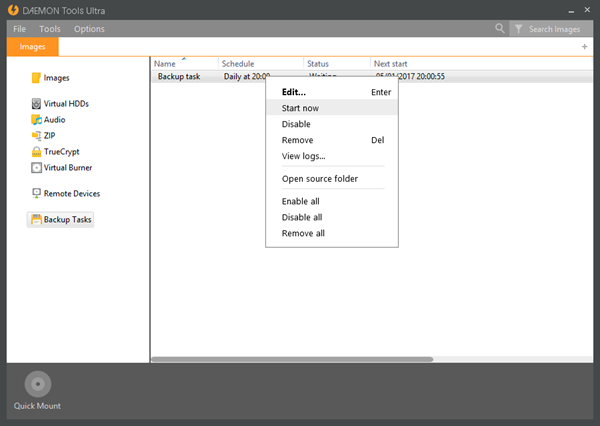
According to the schedule, the next start is coming tomorrow :)

